Active@ Disk Backup is a solution that allows you to create an exact image of the data stored in selected partitions of a hard disk or an image of the entire hard disk.
You can protect your valuable data by regularly making a disk image and keeping it in a safe place. If you have trouble with data corruption, or if you want to refer to an archived version of a file, you can easily restore the data.
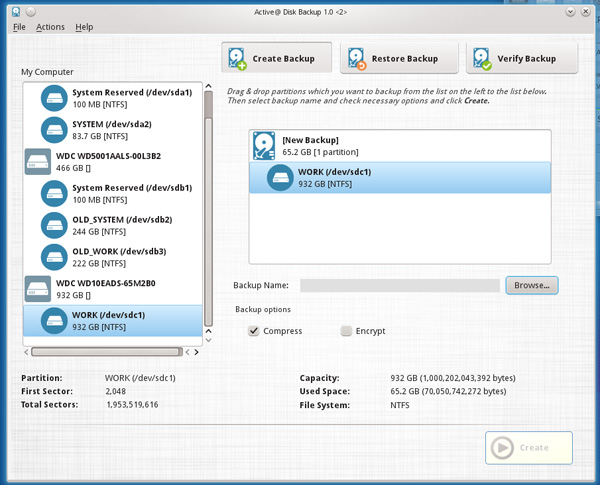
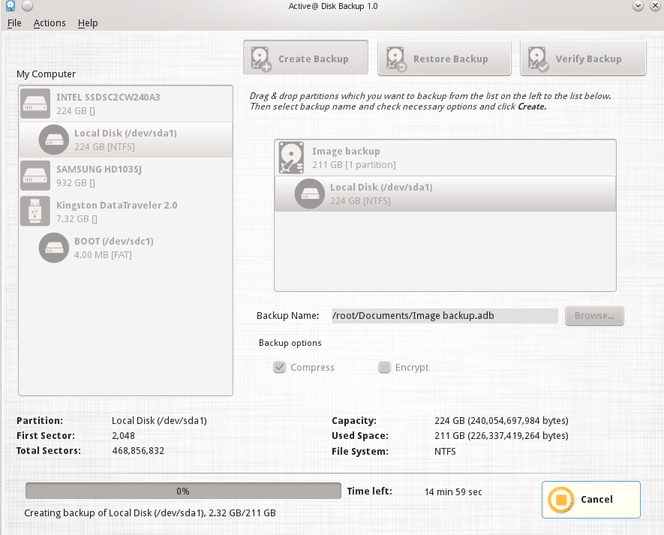
At the top of the main window there are three buttons corresponding to three main actions of Active@ Disk Backup. Select Create Backup to switch to creating backup mode. Alternatively you can choose Actions > Create Backup in the main menu.
On the left side of main application window there is a list of all disks and partitions you can backup. If some disk or partition is missing, Active@ Disk Backup cannot make a backup of it (for example, because the disk is offline).
To refresh the list of partitions click on Reset button.
To the right from partition list is a backup list. It shows the brief information about backup in the root (backup name, data size and number of partitions) and all partitions included into backup.
Under the backup list there are backup name field and backup options controls.
Below partition and backup lists there is property information. Its content depends on the item selected. It could be information about selected disk, partition or backup description.
The bottom part of the window occupies Create button and progress information which is not visible until backup is running.
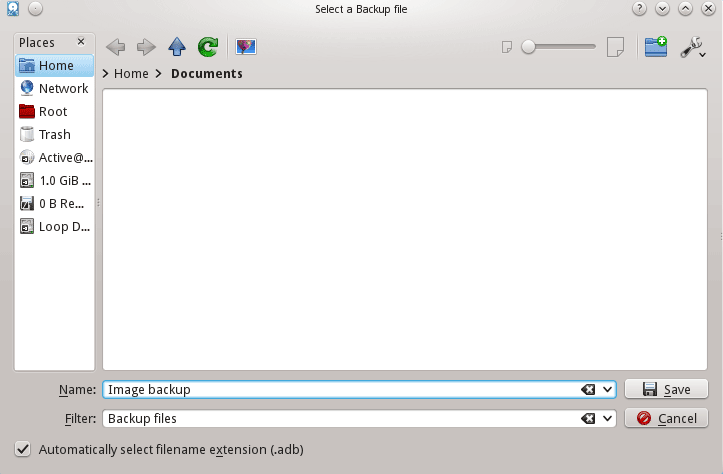
Click on Browse… button to open a file selection dialog and enter the required backup name and location. Backup files have .ADB extension.
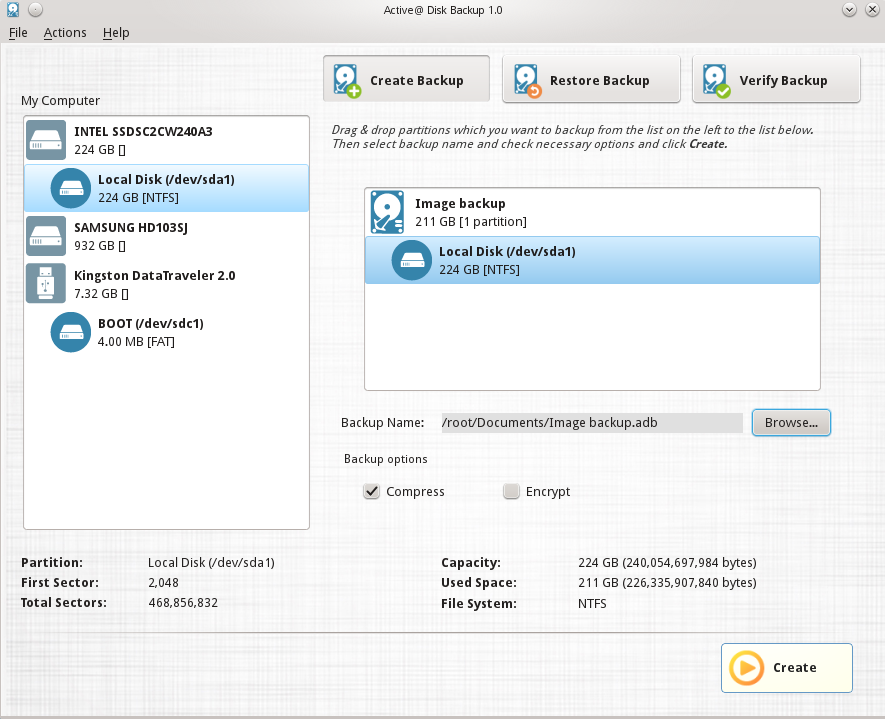
Drag and drop a partition you want to backup from the partition list on the left to the backup list on the right. As soon as you drop a partition its icon in the partition list changes reflecting its status as included into backup. Short backup information is also updated reflecting new backup size and number of partitions.
Under the backup list there are two checkboxes named Compress and Encrypt. If you want backup to be compressed (default option), select Compress checkbox.
Since data on the disk you backup may contain sensitive information you might want to encrypt its contents. To do it, select an Encrypt checkbox. You will be prompted for a password to use for encryption. Please make sure you don't lose your password, since you will need it to restore the data back. Without the password it will be impossible to restore your backup.
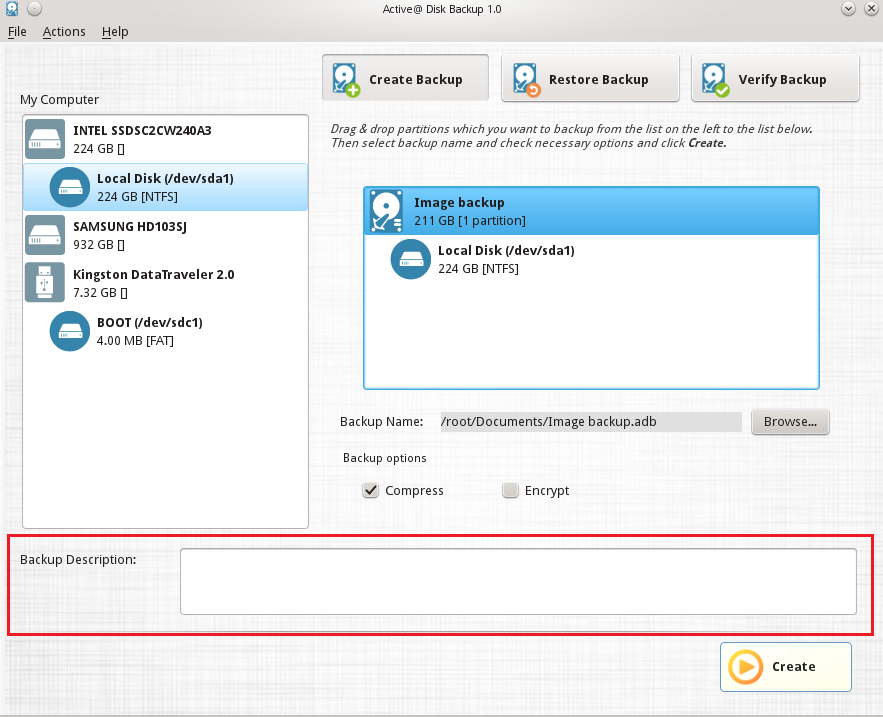
You can optionally add a description to the backup that you are creating. To do this click on the backup item in the top of the backup list.
The property panel on the lower side of the window will show a text field for backup description. Enter any text description you like.
As soon as you have entered the minimum of the information required(i.e. backup name and at least one partition selected for backup) the Create button in right bottom corner of the window will be enabled giving you the ability to start making your backup. As soon as all parameters are set, click Create button to start backup creation.
While disk backup is in progress, Create button is replaced with Cancel button and to the left of it progress information is displayed. It includes the current operation, amount of data processed and time left.
You can interrupt backup creation process by clicking on Cancel button.
At the top of the main window there are three buttons corresponding to three main actions of Active@ Disk Backup. Select Restore Backup to switch to creating backup mode. Alternatively you can choose Actions > Restore Backup in the main menu.
Click on Open… button and select an existing backup. Active@ Disk Backup will open the file and display backup information in backup list in the right part of the main window. It will include backup name, data size and list of all partitions in backup. If you select one of the items in backup, the properties of the item will be displayed below partition and backup lists.
To see a backup description, select the top item in the backup list. Backup description field will appear in the bottom with the text that you have provided while you were creating the backup
If backup is encrypted, you will be prompted to enter a backup password. Backup cannot be restored without a valid password.
Drag and drop a partition you want to restore from the backup list on the right to the partition list on the left. As soon as you drop a partition its icon in the partition list changes reflecting its status as restored. You need to drop the partition on an existing partition whose on unallocated space is either bigger or the same size as the partition you are about to recover.
If you wish to make a restored partition active, click on partition in backup list to make Active checkbox enabled and then select the checkbox.
As soon as you have defined the partition you want to restore, click Restore button to start backup restoring.
While disk backup is in progress, Restore button is replaced with Cancel button and to the left of it you can see the progress information being displayed. It includes the current operation, amount of data processed and the time left. You can interrupt backup restoring process by clicking on Cancel button.
At the top of the main window there are three buttons corresponding to three main actions of Active@ Disk Backup. Select Verify Backup to switch to backup verification mode. Alternatively you can choose Actions > Verify Backup in the main menu.
Click Verify button to start verifying your backup.
While disk backup verification is in progress, Verify button is replaced with Cancel button and, as in previous cases, left of it you can see the progress information bar. It includes the current operation, amount of data processed and time left.
You can interrupt backup verification process by clicking on Cancel button.
During backup verification Active@ Disk Backup computes the check sums of data stored in backup and compares them to the ones stored in backup. Successful comparison means data in backup file match the original and backup is valid, otherwise it is corrupted during creation or storing. The verification result is shown in a dialog box in the end of verification process.
Note! For detailed instructions, see the Active@ Disk Backup User Guide.